
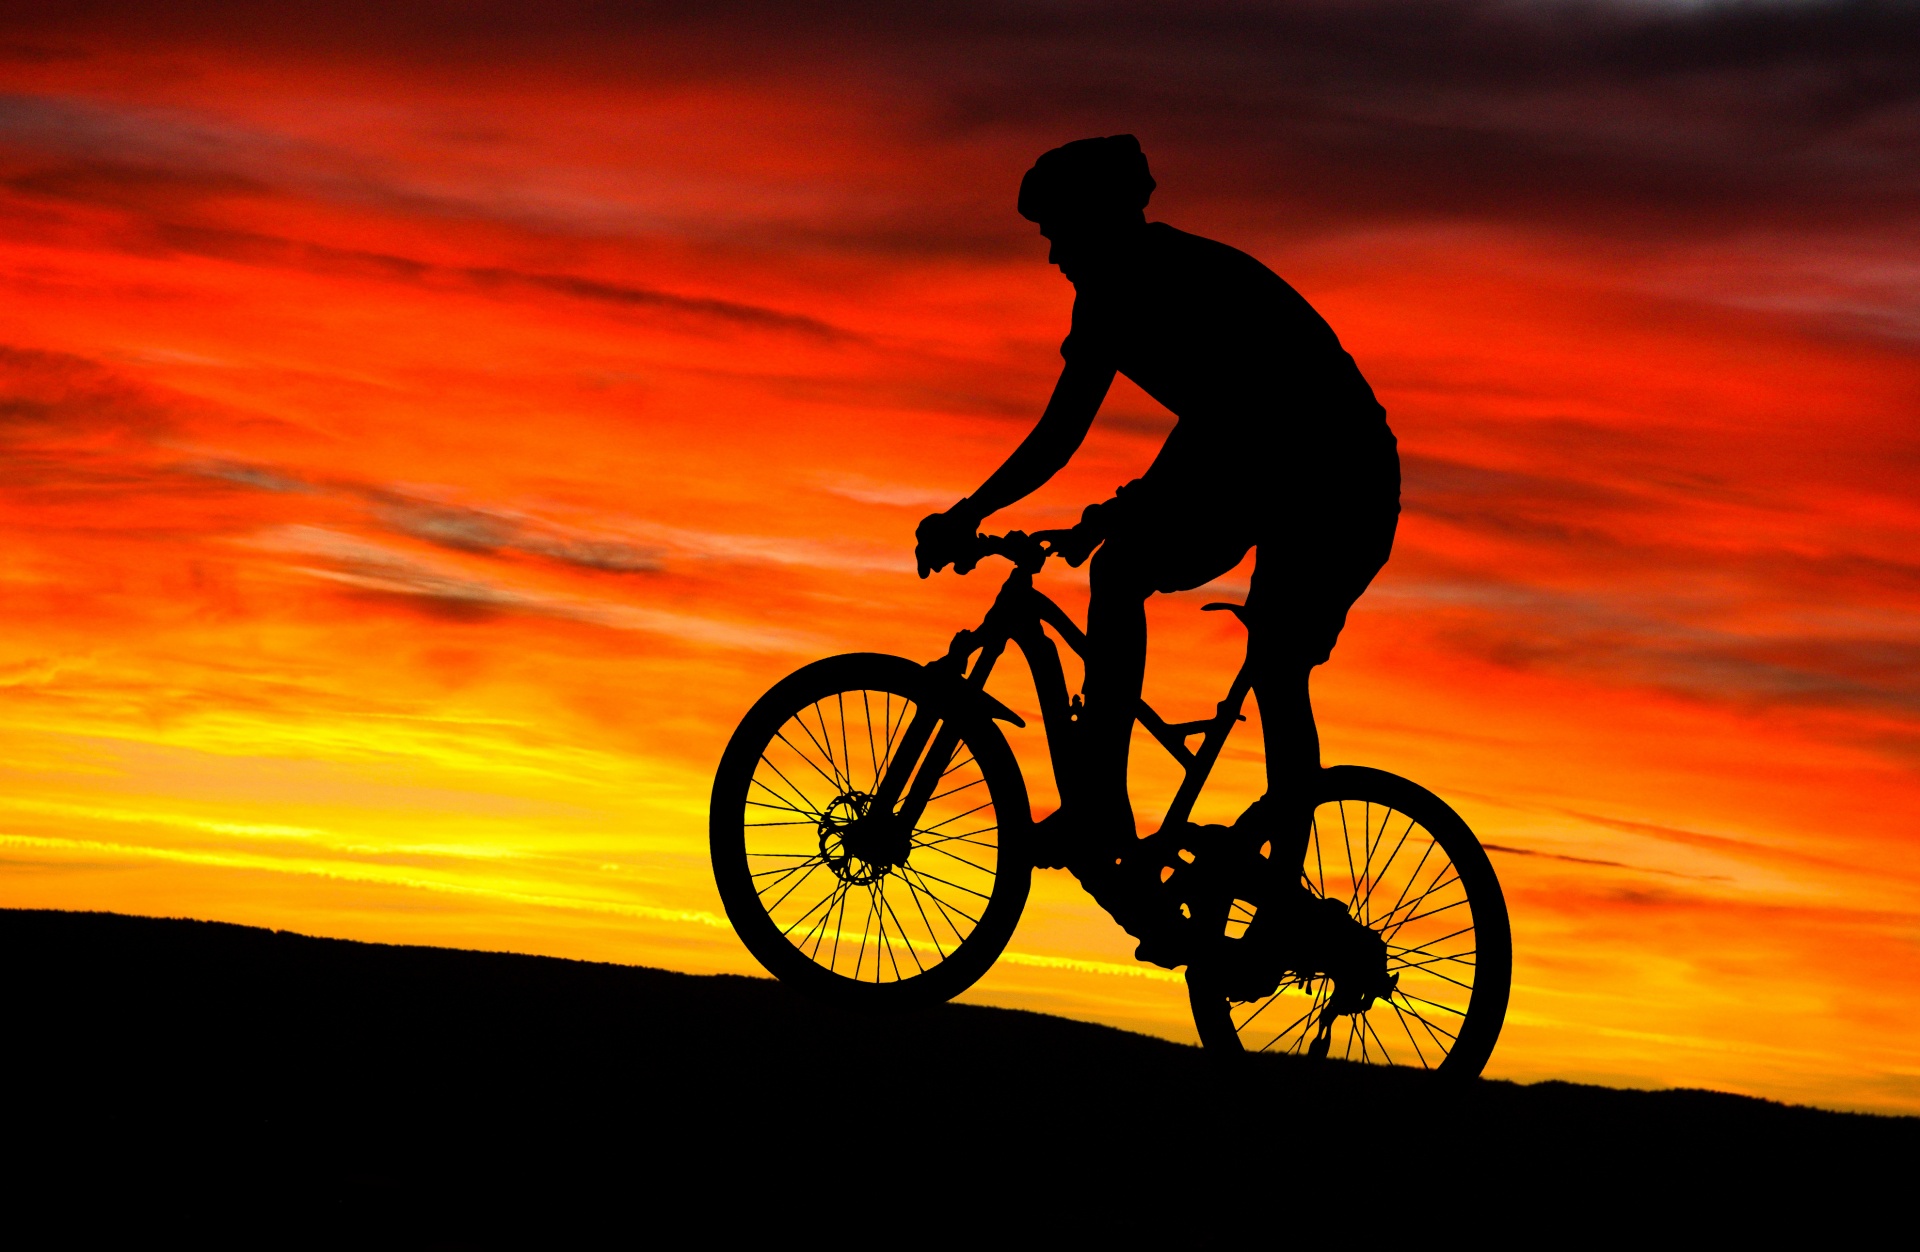
Hey, guys, I am back again to share with you the basic tips on mountain biking, which every beginner should master before doing some serious riding. They worked for me and I strongly believe they will for you to make you a better and safer rider. Consider yourself lucky because I and my co-riders did not have anyone to guide us in our early riding days!
I reckon you might have got the hang of your bike by now and tried a bit of riding too. By the looks of it, you cannot wait to hit the off-roads or trails but are intimidated, especially when you think of the bumpy rock strewn downhills. No worry, that happens to every beginner–everyone has to start at square one. But before you hit the real trail and the single tracks, you better get low-down on some more practical skills.
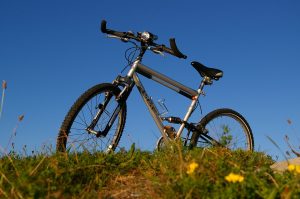
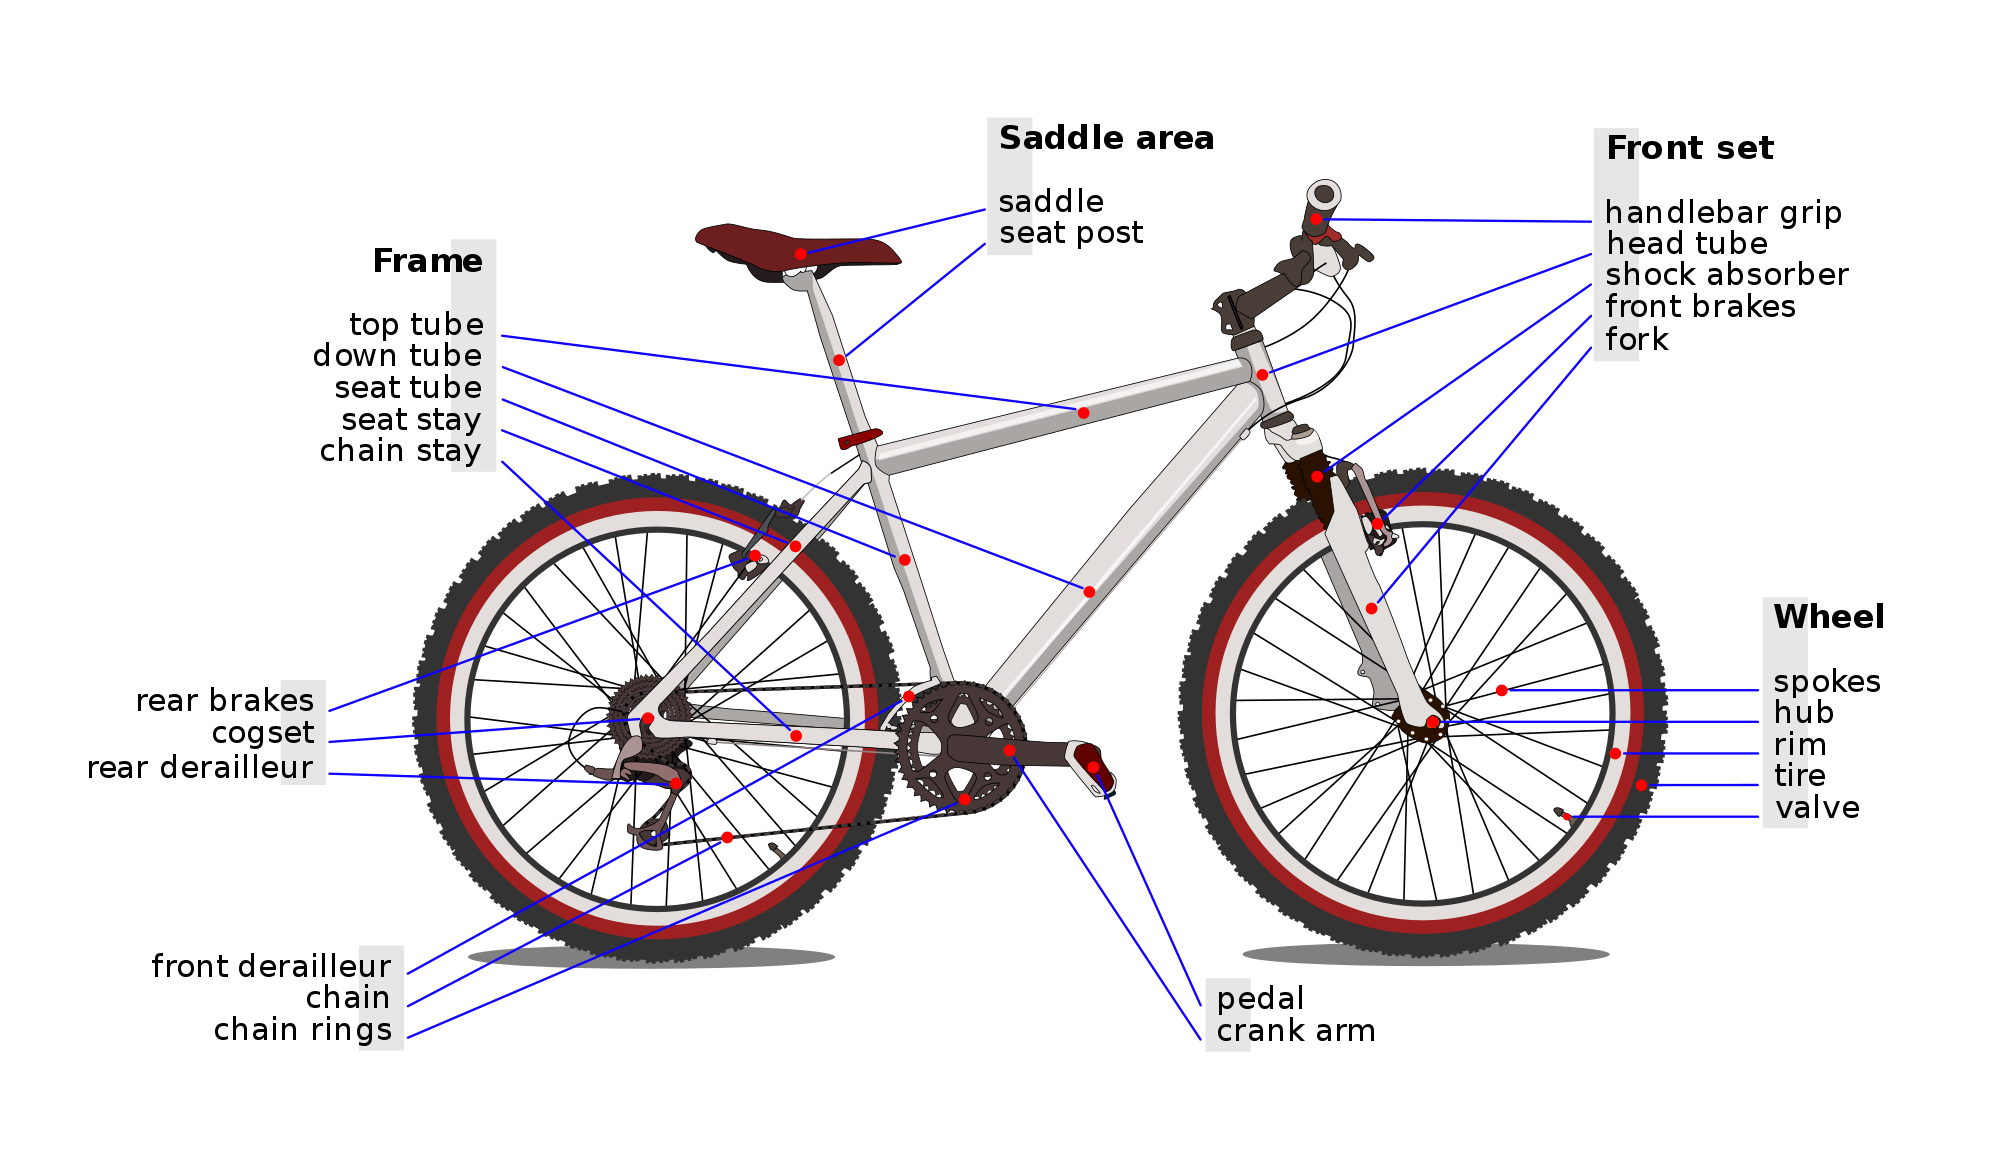
It’s essential, therefore, for an absolute beginner to know the basics such as how to use the brakes, the gears, proper mounting and dismounting, foot position, arm position, the saddle height, etcetera.
Relax
First, relax! Loosen yourself, do not stiffen your stance when on the saddle, do not clench on the handle grips and do not lock your elbows. Slightly bent elbows will ease up on your arms and help absorb the shock while doing bumpy trails or off-road.
Braking
Let’s begin with the brakes, something that took me a long time to learn. First, sit back. Do not rush when it comes to braking. Go easy on them lest you fall off your bike even before you begin your rides!
To achieve good balance over your bike, you have to first know the stopping power of the brakes, the front, and the rear. If you press too hard on the front brakes, the momentum of the bike shifts drastically to the fore-end, the front wheel locks, the rear wheel lifts . . . and the result is obvious– you are thrown over the handlebars. “Ouch!”
Sudden and harder squeezing of the rear brake locks the back wheel and causes skidding making you lose balance . . . and then a–“Crash!”
Brakes are meant to slow you down and to stop–making you comfortable and secure on your saddle. Control and consistency is the rule of thumb. Be gentle on both the brakes and avoid sudden fast squeezing. Decelerate and gently apply both the brakes.
Most of the braking power rests on the front brake. Your front brake accounts for as high as 90% of your downhill stopping power. So if you are going downhill, the best thing to do would be to shift your hips back on the saddle to increase the braking power of the rear wheel and avoid skidding. Keep a slight bend in your knees and elbows to maintain a balance and apply both the brakes evenly.
A word of advice for beginners: Rely on your best judgment. With time and practice, you will grasp the technique better.
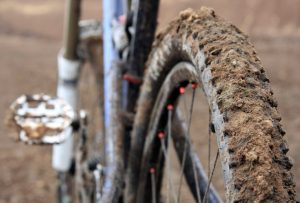
If you happen to take a look at the tyres of the pro riders, you will notice that the front tyres bear most of the wear and tears because they use the front brakes more for better grip and traction.
In other words, the pros know how much of their weight to shift over each wheel and to apply just enough braking power to each brake, so not to ‘endo’ (flip over) over the handlebars or skid down a trail—-something that took me a long time to learn and frankly have not mastered it completely to this today.
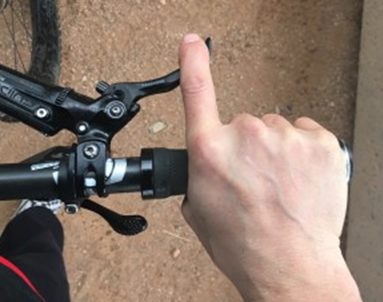
Since all bikes today have disc brakes, using just your index fingers to squeeze gently on the brake levers give you sufficient braking power, while rest of your finger wraps around the handlebar grips. Using more than one finger can be too hard on the brakes and cause loss of control.
Gears and shifting
Now it’s time to get familiar with the gears and their proper shifting. Using your gears efficiently could make all the difference to your biking. Gears are meant to make you pedal comfortably no matter what the terrain.
The front cogs of your bike, called the ‘chainring’, (normally a set of three cog-rings) translate to the degree of resistance. Today’s bikes have been upgraded to two or single chainring. Let’s, however, focus on the three-set chainring in the front for now as is common with the entry level bikes.
Of the three cogs in the chainring, use them alternately according to the terrain you are riding:
- Big chainring: for a flat surface, paved road or when you want more speed. The resistance in this ring is greater and pedalling is harder.
- The middle chainring: This ring is considered the universal one, normally used for all kinds of terrain and the best for beginners to use.
- The smallest chainring: For climbing hills or inclines, paved or off-road. In mountain biking, it’s also called the granny gear. You will be surprised to learn in course of time that you can climb the steepest of hills by engaging this gear.
Always keep in mind that the shifters on your left handlebar control the front chainring, or the front gears and the right ones the rear cassette or cogs.
Next, let’s get down to the rear cogs called the cassette. The cassette includes anywhere from seven to 11 cogs or gears as they are called. The bigger the cog, the easier gets the pedalling. The shifters on your right handlebar control the gearing of the rear cogs or the cassette. The entry-level bikes normally come with nine cogs, also called nine-speed. So, that makes your bike 9×3, i.e., 27 gears.
A word of advice: Cross-chaining (watch video clip).
Avoiding cross-chaining will not only ensure a smooth shifting of gears and comfortable pedalling, but will also cause less wear and tear of the chain, the chainring, and the cassette. An Mtb chain, chainring, and cassette are costly affairs. So the proper combo-use of the chainring and the rear cogs are essential. For almost a year I rode my bike with no knowledge of cross-chaining. So get it right, and do not make the mistake I did, mate!
The best gear combination without cross-chaining would be:
- For uphills: small ring in the front vs. biggest three cogs in the cassette (do not go beyond to avoid cross-chaining)
- For flatter terrain: biggest chainring vs. smaller cogs up to the last three remaining big cogs (if it’s nine cogs use up to six and leave the last three big ones)
- For all kinds of riding: Middle ring (the universal) vs. any rear cogs in the cassette since it causes minimal of cross-chaining
Now that you know about the gears and their proper shifting, take a spin around your neighbourhood and practise gear-shifting before you hit the trail. Always make sure you shift the gears when your pedals are spinning not when stationary. And, always ease up on the pedals when you shift the gear.
Mounting and dismounting
Mounting and dismounting or starting and stopping sound like a piece of cake, but developing the right technique makes you a safer and better rider. The method explained below allows you a quicker mounting and dismounting with an added advantage of making a quick stop.
Ready Mount Method:
1. Straddle the top tube of the bike frame and stand flat on the ground of each side of the bike.
2. Position your right pedal to a 10 o’clock position and lean the bike to your left slightly.
3. Make sure that your bike is in middle or lower gears so that you do not have to push harder on the pedal.
4. Push down on the right pedal with your right foot and stand on it at the same time.
As the bike rolls, put your left foot on the left pedal and raising your butt, seat yourself on the saddle. Voila, you are spinning already! Mind you, while you mount yourself, look ahead, not at your pedals!
Now to stop your bike, decelerate first and gently apply the brakes. When you are at your desired place, shift your body off the saddle forward supporting your weight on your right leg and your arms, and stop the bike with your left leg extended to the ground to support yourself. This way you are back to the starting posture again.
This is the most commonly used method for the riders and I would recommend the same to the beginners, too. The beginners might find this method a little difficult to master at first, but after a little practice they will learn it and take my word for it–benefit a lot from this technique.
For a start, you can mount your bike the conventional style by running along it. But on the trail and a traffic-laden road, the Ready mount method (watch video) always proves more efficient . . . and practised by most.
Saddle height
Another crucial issue is the correct saddle height. If your saddle height is too low, it makes pedalling more difficult and can also cause knee and back pain, especially when you are climbing.
On the other hand, if your saddle height is too high, you are not comfortable, have to squirm and move your hips on the saddle to pedal while your legs are outstretched too much, which can also cause leg cramps.
The rule of thumb to decide the spot-on saddle height is to stand next to your bike and adjust the seat to your waistline where you normally use your belt to hold your pants. Most riders stick to this method. The more scientific method is a bit tricky and you need a partner to help you.
Let your partner hold the handlebar for you when you straddle your saddle. Position one of your foot on the left pedal at 6 o’clock, while the right foot rests on the right pedal parallel to the ground; now make sure that your right foot stretches almost 85 t0 90 % straight with just a slight bend in the knee and you are done.
Beginners, you have stepped on the first few rungs on how-to, such as braking, gear-shifting, starting and stopping, adjusting the saddle height and so on. Now try to apply those techniques and do a bit of riding around in the neck of your woods, or for that matter, a big playground until you are confident enough to hit the real off-road.
Next week, I will familiarise you with the handling skills of doing uphill, downhill, cornering and other valuable tips from some of our pro-riders. I will also let you into some small secrets which I doubt even the hardened bikers today do not know! Until then, keep practising and . . . keep the rubber side down!
Also read: Taking up mountain biking in Nepal: The first steps